Damp Cellars and Crawlspaces: Managing Moisture in Stone Foundations
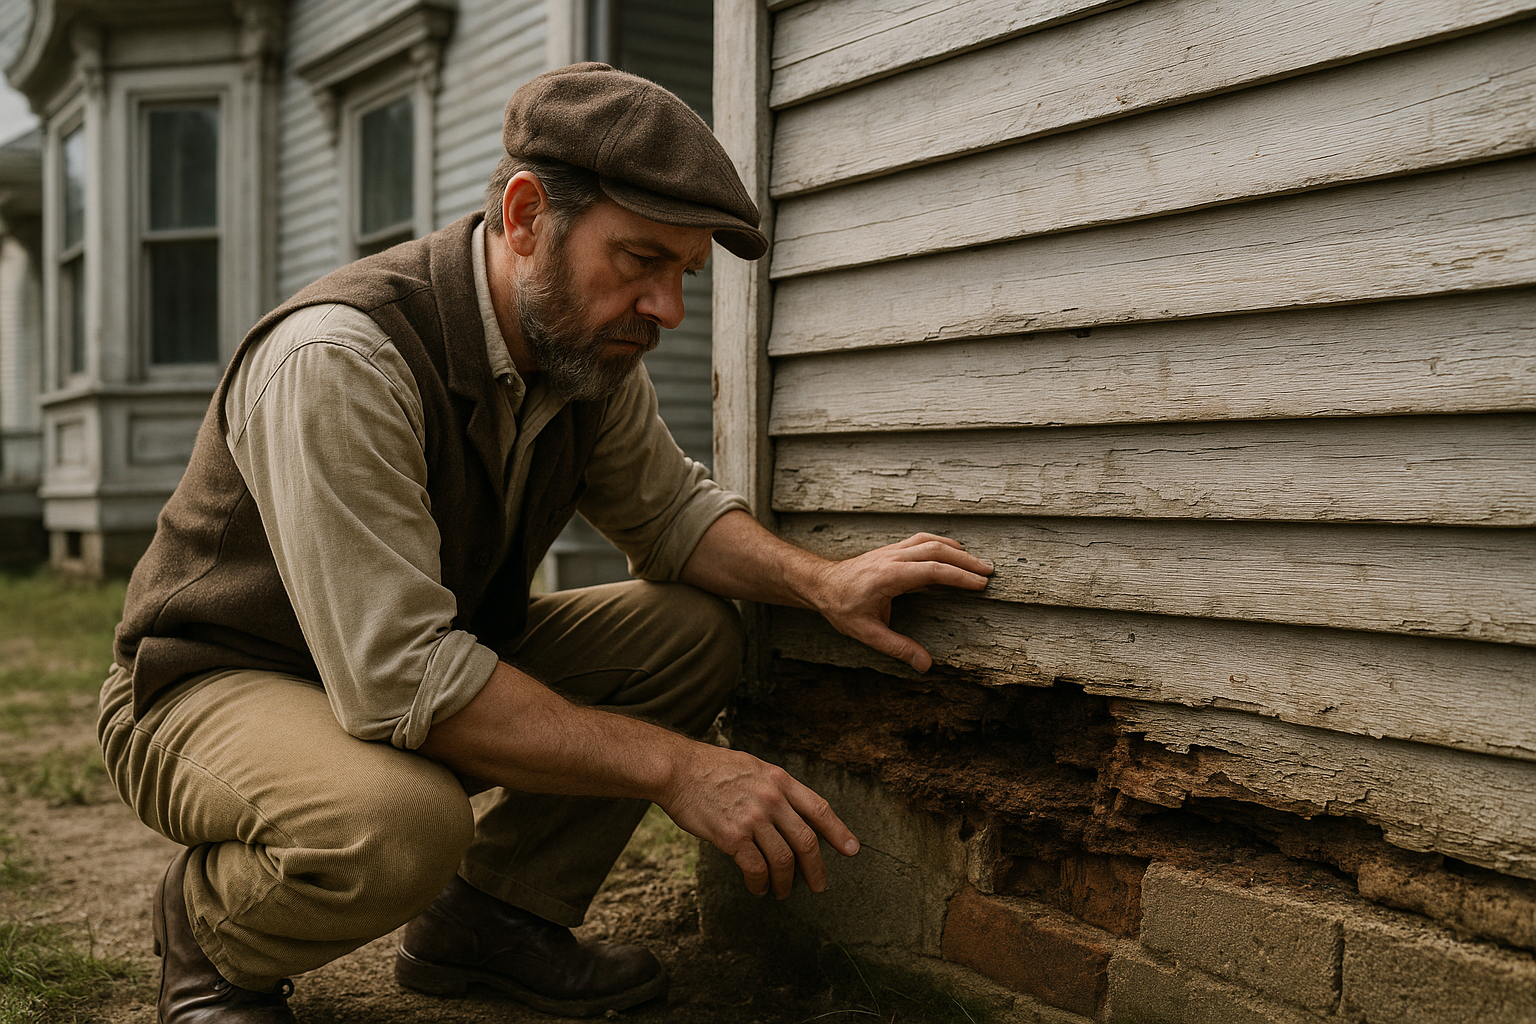
Victorian-era homes are valued for their period details, such as ornate molding, tall windows, and intricate parquet floors. However, these homes often conceal a significant challenge: damp, musty cellars or dark crawl spaces that limit the space's functionality.
When restoring your Victorian house, prioritize managing moisture in the stone foundation to protect its structure.
This guide reveals why Victorian foundations are prone to moisture and rot issues and how to resolve water issues using effective, period-appropriate techniques.
The Victorian Paradox: Permeable Foundations
The core issue is the construction of Victorian foundations. Unlike modern reinforced concrete, which forms a rigid, impermeable barrier, most Victorian homes use rubble or fieldstone foundations.
These foundations were built with local stone, either laid dry without mortar or set with traditional lime mortar.
This construction method lets some moisture pass through the walls. For many years, this was manageable because older homes allowed more air movement. Now, with tightly sealed windows and added insulation, moisture gets trapped. This can lead to high humidity, mold, wood rot, and even structural damage to the building, making it essential to insulate without losing character.
When water seeps through permeable stone walls, it brings additional problems.
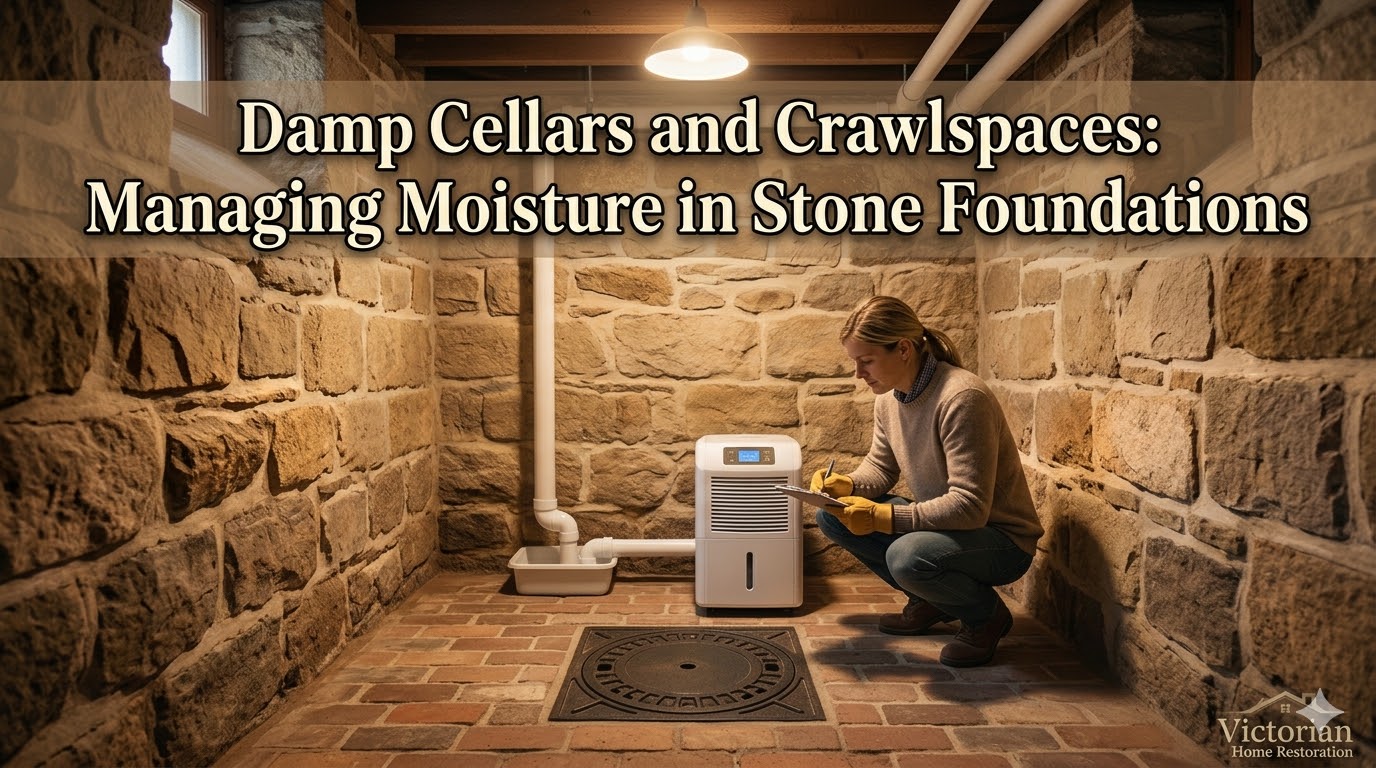
[Image 0: A newly restored, well-lit Victorian cellar, showcasing the rustic beauty of original stone and brick paving, integrated with a modern sump pump and dehumidification system.]
Now that we've considered why Victorian foundations are moisture-prone, the first step is to diagnose the problem.
Before beginning any major structural work, identify the source of water. In old foundations, moisture appears in three main ways:
- Bulk Water Entry: Liquid water pools on the floor or seeps through cracks and pores during heavy rain. This indicates a drainage or exterior grading issue.
- Capillary Action (Wicking): Groundwater can move upward through the foundation’s pores, making the lower part of the wall damp. This damp area can rise 12 to 18 inches above the floor. You might also see white, chalky deposits called salt efflorescence from minerals left behind as water evaporates.
- Hydrostatic Pressure: Groundwater in saturated soil exerts a significant force on the foundation wall, pushing water horizontally through it. This is most common in cellars below the local water table.
2. Implement: The Restoration Toolkit for Dry Walls
Address exterior issues before working inside. Never seal a damp interior wall without resolving outside causes first.
Phase 1: Exterior Water Diversion (The 90% Solution)
A dry basement relies on exterior water management, which is crucial for effective foundation repair techniques. Most issues stem from poor drainage in Victorian homes.
The Gutter and Downspout Audit
Ensure gutters are clear and downspouts discharge water at least six feet, ideally ten, from the foundation. Avoid allowing downspouts to discharge water at the base of the wall, as this can saturate the soil. Upgrade to 6-inch gutters and, if needed, larger downspouts.
Perimeter Grading
The ground should slope away from the foundation wall, dropping 6 inches over the first 10 feet. Correct any low spots, garden beds, or landscaping that trap water near the stone.
Installing an Exterior French Drain
If drainage problems continue, installing a full perimeter exterior drain (French drain) may be necessary. This drain is created by digging down to the foundation base, installing a perforated pipe surrounded by gravel, and covering it again. The drain collects and redirects groundwater before it can enter the wall. Because this is a complex job, most homeowners need a specialist. This approach is often considered best practice for long-term results.
Warning on Sealing Stone: Do not use modern cement-based water plugs or coatings like tar or epoxy on interior stone walls. These products seal the surface but trap water within the stone, accelerating deterioration and potentially causing structural problems. Old stone walls cannot be successfully sealed on the inside because water will always find a way through the permeable material.
Phase 2: Interior Management and Preservation
If exterior drainage is not possible or does not fully resolve the issue, use interior management strategies that preserve the stone's integrity.
Re-pointing with Lime Mortar
The mortar holding the stones together is key to a stable foundation. If you see crumbly or missing mortar, re-point the surface using traditional lime mortar. Lime mortar is breathable and can move slightly with the wall. Avoid modern Portland cement mortar because it is too hard. If the wall moves, hard cement can lead to cracks in the stone or mortar.
Sub-Slab (Interior) Drainage System
For persistent groundwater pressure, an interior sub-slab perimeter drain is an effective solution. This involves cutting the existing floor, installing perforated piping connected to a sump pump, and installing a drainage layer. This system manages water beneath the house before it rises through the floor.
Sump Pump Installation
If water collects in your Victorian stone cellar, have a sump pit and pump installed by a professional. The sump pit collects water from the drainage pipes, and the pump removes it fast to keep the space dry. Pick a strong pump with a backup battery so it keeps working during power outages.
Humidity and Dehumidification
Control cellar humidity to prevent damage. Stone always lets out some moisture. Place a reliable, high-capacity dehumidifier in the cellar and run it nonstop to maintain relative humidity below 50%. Choose a unit that drains automatically into your sump or floor drain for convenience.
Remember, success depends on consistent attention and on combining traditional defenses with select modern upgrades, especially when restoring walls and ceilings.
A dry foundation is essential not only for comfort but also as the key restoration step that protects your home’s structural integrity for the future.